
When it comes to applying cream makeup, you want to achieve a flawless and natural-looking finish. But did you know that using the right techniques can make all the difference? Taking a few extra steps can elevate your makeup game and give you that professional touch.
To begin with, it’s essential to prep your skin properly before applying cream makeup. Make sure to cleanse and moisturize your face to create a smooth canvas. Then, using a primer can help prolong the wear and enhance the performance of your cream products. Remember, less is more when it comes to creams. Apply small dots of product and blend it out gently using a brush, sponge, or your fingers for a seamless application. And for that extra longevity, set your cream makeup with a light dusting of translucent powder.
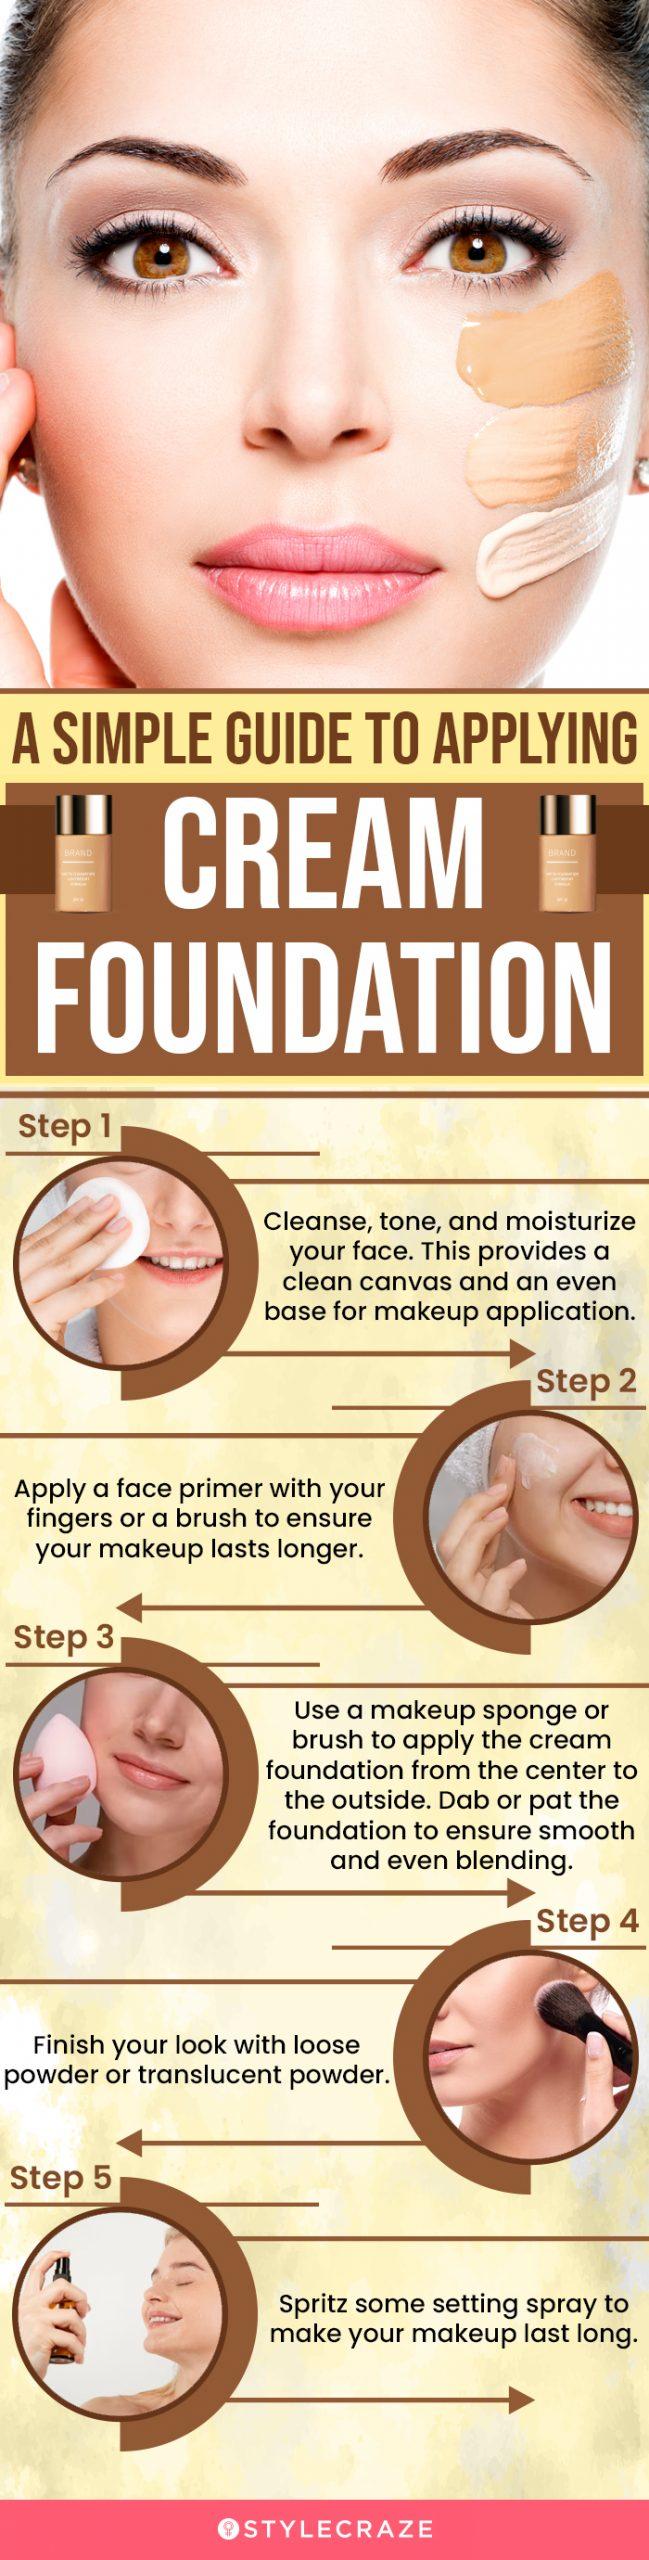
If you want to achieve a flawless, professional-looking finish with cream makeup, follow these steps:
- Start with clean and well-moisturized skin.
- Apply a thin layer of primer to create a smooth base.
- Use a damp sponge or a brush to apply the cream foundation, blending it in upward motions.
- Conceal any imperfections using a cream concealer.
- Set the makeup with a translucent powder for a long-lasting finish.
Remember to blend well and blend until you achieve a seamless, natural-looking result. Try out different techniques and products to find what works best for your skin type.

Achieve Flawless Makeup with Cream Cosmetics
Cream makeup has gained popularity in recent years for its ability to provide a smooth and flawless finish. Whether you’re new to using cream makeup or want to improve your application techniques, this article will guide you through the process. From prepping your skin to the final touches, we’ll cover all the steps necessary to achieve a flawless makeup look using cream products. So, let’s dive in!
Step 1: Prep Your Skin
Before applying any makeup, it’s important to prepare your skin. Start by cleansing your face to remove any dirt, oil, or impurities. Follow up with a moisturizer to hydrate your skin and create a smooth canvas for your makeup. Allow the moisturizer to fully absorb into your skin before moving on to the next step.
If you have any specific skincare concerns, such as dark circles or acne, use targeted treatments like eye creams or spot treatments to address those issues. Giving your skin the proper care and attention will ensure a better application and longer-lasting makeup.
Additionally, if you’ll be wearing cream makeup for an extended period or need extra staying power, consider using a primer. Primers create a barrier between your skin and the makeup, helping it to adhere better and last longer.
Step 2: Choose the Right Tools
The right tools can make a significant difference in the application of cream makeup. Here are a few essentials:
- A foundation brush or makeup sponge: These tools help to blend the cream foundation seamlessly into your skin.
- A concealer brush or small sponge: Use this to apply and blend concealer in areas that need extra coverage.
- A blush brush: This brush allows for precise application of cream blush on the apples of your cheeks.
- A small angled brush: This can be used for applying cream eyeshadow or eyeliner.
- A fan brush: Ideal for applying cream highlighter or bronzer.
Investing in high-quality brushes and sponges will ensure a more professional and seamless application.
Step 3: Foundation Application
When applying cream foundation, it’s best to start with a small amount and build up as needed. Using a foundation brush or makeup sponge, dab the product onto your face in small dots. Then, blend the foundation using circular motions or gentle tapping motions to achieve an even and natural finish.
If you have areas that require more coverage, such as blemishes or redness, use a small concealer brush or sponge to apply an extra layer of foundation. Remember to blend well to avoid any harsh lines or unevenness.
Setting the Foundation
To ensure the longevity and smudge-proof nature of your cream foundation, set it with a translucent powder. Use a fluffy powder brush to lightly dust the powder all over your face. This step helps to lock the foundation in place and prevents it from sliding off throughout the day.
Step 4: Concealer and Color Correction
Cream concealers are perfect for hiding dark circles, blemishes, and other imperfections. Dab a small amount of concealer onto the area you want to correct and blend it gently using your fingertip or a concealer brush. Remember, the key is to tap or press the product into your skin instead of rubbing it.
If you have any discoloration or redness, you can also use color correctors before applying your concealer. For example, green color correctors neutralize redness, while peach or orange correctors counteract dark circles. Apply the corrector to the areas that need correction and blend it well.
Step 5: Adding Color with Cream Blush and Bronzer
Cream blushes and bronzers can add a natural flush of color to your cheeks and a sun-kissed glow to your skin. Using a blush brush or your fingertips, apply a small amount of cream blush to the apples of your cheeks and blend it gently towards your temples. Be careful not to apply too much product at once – it’s always easier to add more than to remove excess.
If you’re using cream bronzer, apply it lightly to areas where the sun naturally hits your face, such as your forehead, temples, cheekbones, and jawline. Blend it well to achieve a seamless transition and a natural-looking shadow.
Step 6: Enhance Your Eyes with Cream Eyeshadow
Cream eyeshadows can create a beautiful, glossy effect on your lids. Using your fingertips or a small angled brush, apply the cream eyeshadow to your eyelids. Start with a small amount and build up the intensity as desired. Blend the edges for a seamless transition and use an eyeshadow brush to set the cream eyeshadow with a corresponding powder eyeshadow, if desired.
Step 7: Define Your Eyes with Cream Eyeliner
Cream eyeliners can create precise lines and add definition to your eyes. Using a small angled brush or an eyeliner brush, apply the cream eyeliner along your lash line. Start from the inner corner and move towards the outer corner, adjusting the thickness of the line as desired.
If you prefer a softer and more subtle look, you can smudge the cream eyeliner with a smudging brush or a cotton swab for a smoky effect.
Step 8: Highlight Your Features with Cream Highlighter
Cream highlighters can add a beautiful glow to your high points, such as your cheekbones, brow bone, bridge of the nose, and cupid’s bow. Using a fan brush or your fingertips, apply a small amount of cream highlighter to these areas and blend it gently for a luminous effect.
Step 9: Perfect Your Brows with Cream Brow Products
Cream brow products, such as brow pomades or creams, can help you achieve fuller and more defined brows. Using an angled brow brush, apply the cream brow product to your brows in short, feathery strokes. Fill in any sparse areas and shape your brows to your desired shape.
Step 10: Finish with Cream Lipstick or Lip Gloss
Cream lip products provide hydration and color to your lips. Using a lip brush or your fingertips, apply the cream lipstick or lip gloss to your lips. Start from the center and move towards the corners, ensuring even coverage.
If you prefer a more precise application, you can use a lip liner to outline your lips before applying the cream lip product.
Comparison: Cream vs. Powder Makeup
| Cream Makeup | Powder Makeup | |
| Finish | Provides a dewy and natural finish. | Gives a matte finish. |
| Application | Blends easily with the skin. | Requires more effort to blend. |
| Coverage | Buildable coverage with a natural-looking finish. | Offers more coverage, especially for oily skin. |
| Longevity | May require touch-ups throughout the day. | Tends to last longer on the skin. |
| Best for | Dry to normal skin types. | Normal to oily skin types. |
Key Takeaways
- Start by prepping your skin with moisturizer and primer.
- Apply cream foundation using a brush or sponge for even coverage.
- Blend the product into your skin using gentle upward motions.
- Use cream blush and bronzer to add color and definition to your cheeks.
- Set your makeup with a translucent powder for a long-lasting finish.
Frequently Asked Questions
In this section, we will answer some common questions about how to apply cream makeup.
1. What is the best way to prepare the skin before applying cream makeup?
Before applying cream makeup, it is important to prepare the skin properly. Start by cleansing your face with a mild cleanser to remove any dirt, oil, or makeup residue. Follow up with a toner to balance the skin’s pH levels and minimize the appearance of pores. Next, apply a moisturizer that is suitable for your skin type to hydrate and nourish the skin. Allow the moisturizer to fully absorb before moving on to the next step.
Once your skin is clean and moisturized, apply a primer to create a smooth and even base for your cream makeup. The primer will help the makeup adhere better to the skin and prolong its wear. Gently massage the primer into your skin using upward motions, focusing on areas with enlarged pores or fine lines. Allow the primer to set for a few minutes before proceeding with the cream makeup application.
2. How should I apply cream foundation for a natural-looking finish?
To achieve a natural-looking finish with cream foundation, start by taking a small amount of product on the back of your hand. Using a foundation brush or a sponge, dab the cream foundation onto your face in small sections, blending it outwards towards your hairline and jawline. Focus on areas where you need more coverage, such as blemishes or redness.
Blend the cream foundation well into your skin, making sure there are no visible lines or streaks. If necessary, you can build up the coverage by layering more product, but remember to blend it seamlessly for a natural look. Set the cream foundation with a light dusting of translucent powder to help it last longer and reduce shine. Finally, finish off with a setting spray to lock the makeup in place and give your skin a dewy, fresh look.
3. What is the best technique for applying cream blush?
When applying cream blush, start by taking a small amount of product on your fingertips or a blush brush. Smile to find the apples of your cheeks, and gently pat the cream blush onto them. Blend the blush upwards towards your temples using light, circular motions to avoid harsh lines.
For a natural flush, make sure to blend the cream blush well into the skin. You can also layer the blush for a more intense color payoff, but be careful not to overapply. If needed, use a clean makeup sponge or a fluffy brush to blend any excess blush and create a seamless finish. Set the cream blush with a sheer powder blush in a similar shade for added longevity and a subtle glow.
4. How can I apply cream eyeshadow for a long-lasting and vibrant look?
To create a long-lasting and vibrant look with cream eyeshadow, start by applying an eyeshadow primer to your eyelids. This will help the cream eyeshadow adhere better and prevent it from creasing or fading throughout the day. Allow the primer to set for a minute or two before moving on to the next step.
Using a clean fingertip or a flat synthetic brush, apply a small amount of cream eyeshadow onto your eyelids. Gently pat and blend the eyeshadow onto the lids, focusing on the areas where you want the most color intensity. For a more intricate eye look, you can use a small, fluffy brush to blend multiple shades of cream eyeshadow together.
Once the cream eyeshadow is applied, use a clean blending brush to soften any harsh edges and blend the colors seamlessly. Set the cream eyeshadow with a matching powder eyeshadow to prolong its wear and enhance the vibrancy. To complete the look, apply eyeliner and mascara as desired.
5. What is the best way to remove cream makeup at the end of the day?
Removing cream makeup at the end of the day is crucial for maintaining healthy skin. Start by using a gentle makeup remover or a micellar water to dissolve the makeup. Soak a cotton pad with the remover and hold it against your skin for a few seconds to allow the product to break down the makeup.
Gently swipe the cotton pad across your face, focusing on areas with heavy makeup, until all the cream makeup is removed. Avoid rubbing or tugging at the skin, as this can cause irritation. Follow up with a gentle cleanser to cleanse the skin further and remove any residual makeup or impurities. Finish off with a moisturizer to hydrate and nourish the skin.
USING ONLY CREAM PRODUCTS | FULL FACE MAKEUP TUTORIAL
To apply cream makeup, start by preparing your skin with a clean and moisturized face. Use a beauty blender or your fingers to dab small amounts of cream foundation onto your forehead, cheeks, and chin. Blend it outwards in upward strokes for a natural finish.
Next, apply cream blush by smiling and using your fingers to gently dab it onto the apples of your cheeks. Blend it in circular motions for a flushed look. To add dimension, use a cream contour or bronzer to define your cheekbones, jawline, and nose. Blend well to avoid harsh lines.


Leave A Comment